VIDEO:
30 SECOND
PART BUILDER
EXPLAINED
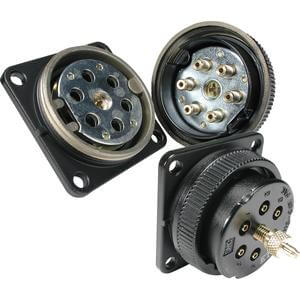
Multi-connectors are used to attach panels to machine equipment. Multiple tubes (nylon, polyurethane) can be securely mounted and unmounted with a single action.
· Effective in reducing labor when separating panels from machinery for transport, and when replacing the units in case of malfunctioning, etc.
Features
· The unique positioning mechanism means that this product can be installed and removed with ease, even in places that are hidden from view, without any risk of misalignment caused in the course of detachment and reattachment.
· The simple mounting procedure helps reduce labor hours dramatically compared to using a number of bulkhead union fittings for panels.
· Allows for clamping and unclamping of all tubes with a single action
· Available in 6-tube or 12-tube models.
Part Number
Configure to get your Part Number
| Fitting Type | Other shapes | Application | Standard/Mini | Compatible Fluid | Air |
|---|
